Sunday, February 28, 2016

Goodbye


There comes a time when a Design Team member feels it is right to move on
to new adventures....and today we will be saying goodbye to Shari...

Shari has been such an amazingly supportive, kind, understanding and caring team member who has always been such a complete delight to work with.

We are so glad that she has been part of Our Creative Corner and we also want to thank her for the wonderful effort she put into her job as Spotlight Coordinator for the team.
Today we are sharing with you some memories of the brilliant creations she has shared with us during her time spent at Our Creative Corner and we know that you will all enjoy looking back at her amazingly inspirational work.


Please join us in wishing Shari the best of luck and happiness wherever her path leads....
Love from the OCC Team
 xxxx

Friday, February 26, 2016

Make Your Own Expermenting Journals by Giving Old Planners a New Life!

Hello and servus!

Claudia here to bring you another inspirational post as OCC's "Resident Guest Designer"!

If you - like me - are a hopeless hoarder of notebooks and planners and - like me - can't cope with throwing away half or un-used planners from the year before, you may like this post as I am trying to give one of them a new life as my new "experimenting journal".

With "experimenting journal" I mean what it says: not use it or create in it with a finished and presentable journal page in mind but to experiment and use it as a working tool - try out new markers, paints, how one works on top of the other and such things. Do some doodling exercises. Practice drawing or handwriting skills....or simply throw on some paint, glue on scraps...just to be creatively "movin'" to stay in the flow.


I had only just received my awesome Brett Weldele "Creepy Trees" stencil (I finally managed to buy online without having to pay a fortune for shipping costs) and I knew I HAD to use that one!!!

So the first thing I did was cover the front cover with a layer of black acrylic paint. Once that was dry I worked over that with some DecoArt Americana acrylic paints  that I stippled on wet on wet and let them mix during that process.


Stippling a new colour tone over an other one that is still wet creates a lovely blending effect:


During the whole process of stippling on and mixing colours the trees stencil was being held in place firmly! As it is made from a rather rigid material I had no bending or smudging from paint creeping underneath (as it happens sometimes when using paints that are too fluid or masks or stencils that are made from softer material)!

Next I stamped on some texture using an opaque white stamping ink and an Andy Skinner stamp with a scratch pattern.


I added some finer branches using a 3rdEye stamp and black archival stamping ink to create more depth:


 Before I put on the idea-ology word stickers I also stamped on some small scrip patterns here and there. The word stickers were outlined using a white gel pen to help blend them in.


 I also drew a thin white outline around the cover's edges to repeat the white outlines around the word stickers.

Some white and orange DecoArt Media Mister paint was sprayed on to create beautiful splatters and drip lines.


 For a finish I also sprinkled on some bright green using the Liquitex splatter brush. I covered the two word stickers with paper strips during that process.


I used my fingers and the paints I had used on the cover to tone down the bright neon orange colour of the rubber band that holds the planner shut! (and as I am writing this post I find that I forgot to do so with the little ribbon that is used to mark the page you're on).


My plan with this old altered and barely used planner is to hopefully also share some of the experiments I will be making in it from time to time. I will have to glue together pages to make them more sturdier or maybe also gesso them first...but the main aim is to use this as a place where to create without the hindhought of showing (or showing off) but to discover new paths for the creative journey.


Maybe that would be something you would love to try too...and of course I would love to see part of your journeys shared with me as well ;)


Hugs and happy crafting,
Claudia 
xxx


Monday, February 22, 2016

Top Talent For 'Wish Upon A Star' Challenge

Good morning everyone, it's time for another Top Talent spot here at Our Creative Corner. Our guest today was the winner of Trish's challenge 'Wish Upon A Star' so please welcome the hugely creative:


Yulia produced a beautiful star creation which captivated our imagination. Let's find out a little more about Yulia:

Where do you live? 
 I live in Russia. In the Urals. In a very picturesque place. Most of the time I spend in the village barn. Here it is insanely beautiful - mountains, rivers, lakes.
How would you describe the type of crafting that you do?
Scrapbooking to me is a vacation from work. Where you can let go of the soul and to get away from the experience. It's my salvation. I treat people and get to see a lot of suffering ... and when I do scrapbooking, all the pain that I have seen, leaves.
Name three art supplies that you could never do without.
I like to use chipboard, sisal and micro beads.
Name one artist that inspires you and tell us why.
The favourite artist I do not have. I like very many. It all depends on my mood.
Which is your favourite 'go to' technique when crafting?
Techniques such as embossing and stamping.
Which is your favourite season or occasion to craft for?
I always enjoy creating. I'd rather do it without any special reason, just for pleasure.

Yulia, thank you so much for sharing a little of your life with us. I feel so inspired by your answer to the second question. I think Yulia's answer to this question gives the reason that so many of us turn to our crafting - to escape and dwell in a world which soothes our souls, even if it's only for a few minutes at a time from our everyday lives. 

Here's the beautiful project which Yulia created for us and she says that this piece is a 'visualization of my dreams - a trip to Venice'. 


What an absolute feast for the eyes this beautiful project is Yulia! The colours and textures are superb and it is certainly one of those projects which I would love to see in real life. Wonderful close up images which give us so much detail to drink in. The opulence of the piece, the palette and that gorgeous mask just shout Venice to my mind. I'm sure that you are all delighted to see Yulia's project and I hope it inspires you in your crafting. Thank you Yulia for joining us - it has been an absolute pleasure to work with you. Please drop by Yulia's blog by following the link near the top of this post - you will not be disappointed by what you find.

Would you like to see your work showcased here in the coming months? This can only happen if you link up with us for one of our challenges. There's still time to join us for Jan's February challenge which is Sew and Sew - just click on the link and find out all the details and have a look at the wonderful inspiration from the DT.

Our generous sponsor this month is: 
 Darkroom Door will be giving our randomly drawn winner one Rubber Stamp Set 
which is valued at $31.95 AUD 

I have another wonderful Top Talent waiting in the wings for you for next month. Just pop back to Our Creative Corner on the 22nd March and all will be revealed! Thank you so much for joining us today.

 Julia xx


Thursday, February 18, 2016

Darkroom Door Sponsor Spotlight #2

Hi There and Welcome Back to our 2nd Darkroom Door Sponsor Spotlight of the month! 


Today, our Sew and Sew Challenge Hostess Jan (found Scrapbooking from the Attic, from time to time), is showcasing a project in keeping with her own challenge theme.  


I was so excited when I received my rubber stamps from Darkroom Door.
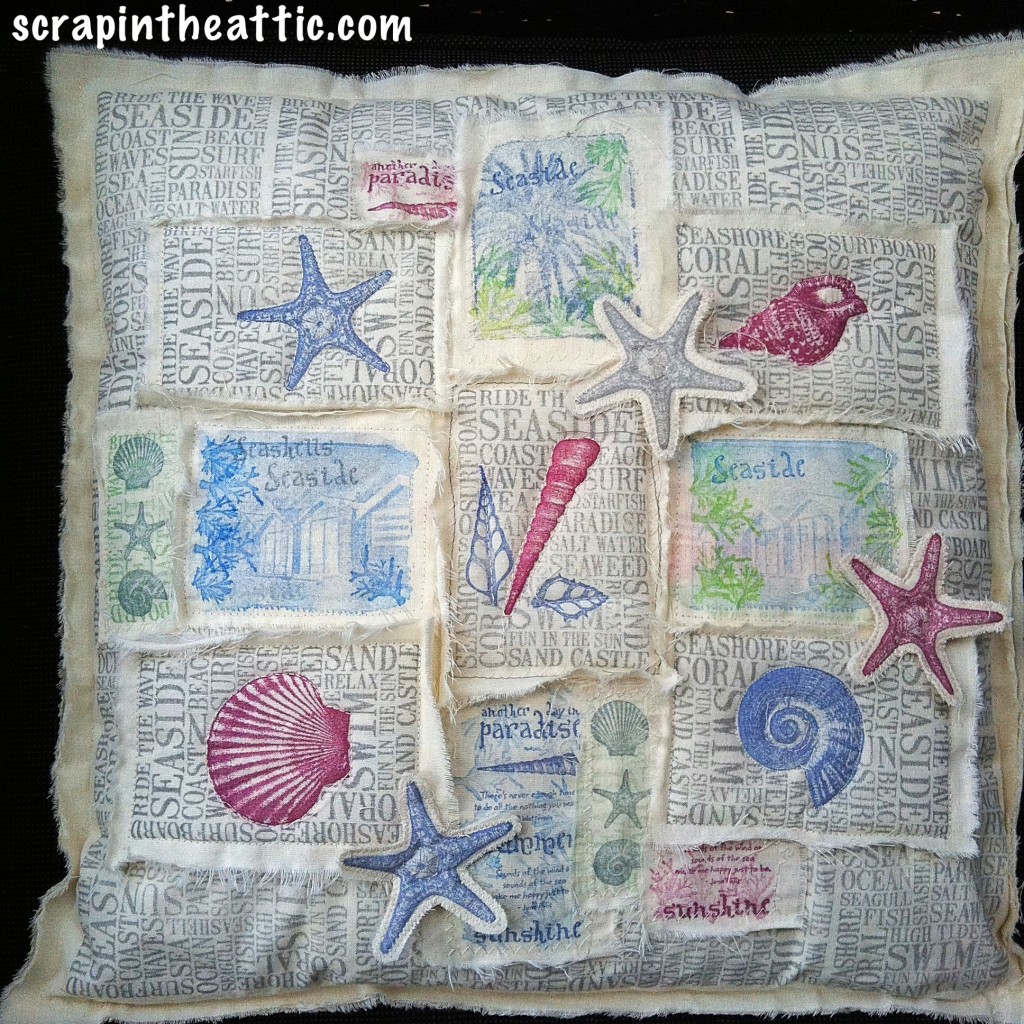
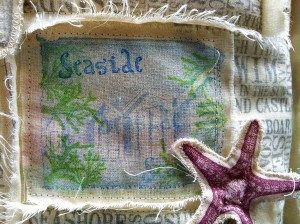
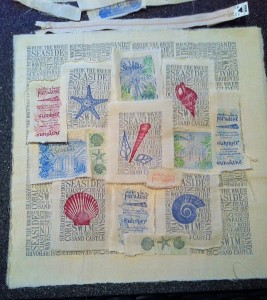
 The detail and stamping is beautiful, they are a joy to work with. I decided to follow the February Challenge theme and have an element of sewing. I wanted to create a patchwork effect to show off all the stamps, it ended up as a cushion!


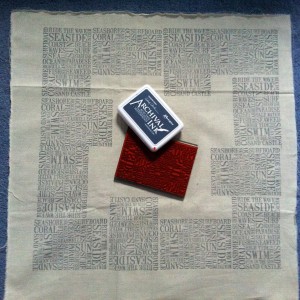
I wanted a patchwork effect so I tore strips of calico (from my daughters stash!) I love how the fabric frays and reminds me of waves on the shore, perfect with these sea themed stamps. I used Archival Ink and was so thrilled with how the stamps worked with the fabric showing all the details.
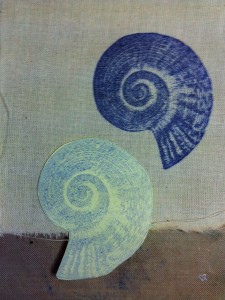
I used masking techniques for the shell patches.


I stamped the shell onto the fabric, then onto a post-it which I cut out then positioned on top of the shell when I stamped the background. I heat dried the ink before stamping the background.


I created all the shell patches this way.


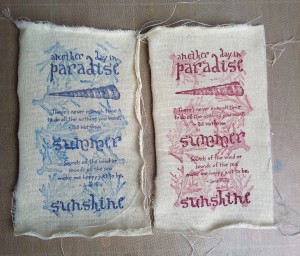
I enjoyed playing with the other stamps in the sets to create different effects, adding layers of stamping with the seaweed and translucent inks and repeat stamping. I tore some of these into smaller strips.


The photo stamps have amazing detail and I love the effect on the calico. I stamped seaside and seaweed stamps over the top to create more interesting layers.


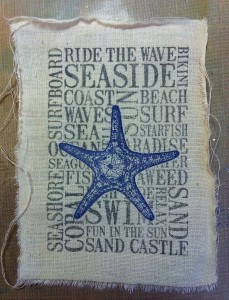
I used the background stamp in a repeating pattern on the cushion front. 
My cushion pad was 16 x 16 inches square so I started with a larger piece and tore the edges to fit when I had finished all the stitching.


I stamped lots of patches of different sizes to play with to get the effect I wanted. I used a 14 inch zip at the base of the cushion. The shell patches were padded with toy filling before machine stitching to give them dimension. I hand and machine stitched around the shells to make them puff up a little. The other patches were sown flat onto the base. I folded the ripped edges so they were raised up and ruffled.


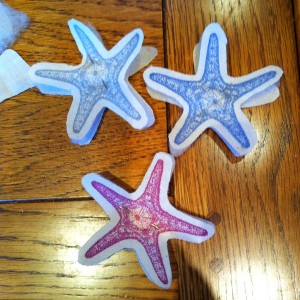
I wanted more layers so my favourite starfish was stamped, then cut out with a layer of padding and calico and machine stitched around the edge. I hand sewed them onto the cushion at the end.


I was so thrilled with the finished cushion. It reminds me of all of the holidays I have spent collecting shells with my children and granddaughter. I also remember all our lovely holidays in Australia where Darkroom Door is based. 

A huge thank you to Rachel for the opportunity to use her stamps.

You still have time to enter my challenge, Sew and Sew.  I hope this has inspired you to try something different.

Hugs Jan x

Such an Amazing sewn creation, Jan!  Your use of the nautically themed Darkroom Door Rubber Stamps to create this cozy looking cushion is just Wonderful! 

And like Jan mentioned, there's still time to enter your sewing themed projects into her Sew and Sew Challenge--there are 10 days left, 'sew' what are you waiting for?  Hope to see you there!


Monday, February 8, 2016

Darkroom Door Sponsor Spotlight #1

Hello and Welcome to our first Sponsor Spotlight of this new challenge month of February.  We are very happy and honored to have- 


-as our Sew and Sew Challenge Sponsor this month!  Darkroom Door is generously awarding one of our randomly chosen Sew and Sew Challenge participants with a Darkroom Door Rubber Stamp Set ($31.95 AUD value)!  The Sew and Sew Challenge is open until February 28th--plenty of time to bring your sewing related creations over.....
 
Now, without further ado, OCC DT Member-Extraordinaire Candice (aka Tincan Crafter) is here to showcase some amazing creations she made with one of Darkroom Door's fabulous Rubber Stamp Sets--
 
I have had a fascination with Japan and Asia since I was a little child.  In my twenties I was fortunate enough to spend about 7 years over in Japan in Nagasaki and Shiga.  So when Darkroom Door generously sponsored me with the awesome Kimono Vol. 2 Stamp Set - I was thrilled and decided to draw on that experience to do these.


The Collection as shown above, consists of two Kimono clad ladies, the "Kanji" for Love, a sakura laden tree branch, a fan and three "Mon" (a crest typically signifying a family clan).  I decided to play around with every element in the collection to create a set of 4 multi-purpose cards.

Here below, are the 4 cards with a little explanation of what I used from the collection--

 Kimono First Lady 

The focal point of this card is the lovely Kimono adorned lady who is looking behind her.  I stamped her onto card stock and coloured her in with ink.  I stamped the Kanji for Love onto a wood tile and heat embossed it.  I layered the image onto various mats of washi paper, added a few brads and some twine to finish it off.

Fan Box

I stamped the fan from the collection in three different shades of Archival Ink onto Flower Print Origami Paper and fussy-cut them out.  I used gold ink to create contrast along the edges of the fan.  I used a genuine piece of washi fabric to mat the fans in a vertical 3 pattern.  I drew in some branches and punched out tiny sakura flowers out of the same origami paper to adorn what I intended to look like a sakura tree branch. The card is a window box card - the idea was that it looked like the shrine corner in Japanese Houses.

Sakura Lanterns

Using the Sakura branch stamp and two of the "mon" stamps - I came up with a lantern type card.
I cut out a big circle from silk print cardstock, stamped the Sakura Branch onto it.  I then coloured in the image with an assortment of Sakura Gel and Glaze pens.  To make the base of the lantern - I cut out two rectangles - rounded off the edges and used Walnut stain distress Ink to colour it.  For the smaller lanterns - I die cut round tabs from the Cricut line of dies.  I stamped on two of the "mon" images.  

Leafy Kimono and Lanterns

I used all the "mon" stamps and the Love Kanji on the square lanterns.  I made those by die-cutting rectangles, rounding off the corners and running the big rectangle through a crimper.  I also stamped the Lady in the Leafy Kimono and coloured her in with Sakura gel and glaze pens.  I cut a window out of some cardstock and embossed that with wood grain design.  I glued on some Washi paper on the reverse side to create the effect of the lady entering through a washi door.

I hope Darkroom Door will be happy with what I have envisioned and created with this beautiful collection of stamps

I am having serious problems with internet connectivity right now so I am unfortunately unable to show you a photo-play-by-play on how I created each card.  However I do hope that you have enjoyed these cards and that you will head over to Darkroom Door and pick up this awesome collection as well as see what other amazing collections they have.

Thanks for stopping by to have a look at these.  Please leave me a comment if you would like better details or explanations of anything that you would like to know more about, in the event that you wish to recreate it.

Happy Crafting everyone!

(aka - Tincan Crafter)
 
WOW, Candice!!  You've truly brought your experience and knowledge of Japan to life in this Outstanding set of cards!  I know, that not only will Darkroom Door love these creations, so will our readers--Each card more is beautiful and original than the last. 
 
Thank you for joining us today, for our first Darkroom Door Sponsor Spotlight of the month.  We'll have another Spotlight on the 18th, so come back then and see another Awesome OCC DT creation using Darkroom Door images. 


Thursday, February 4, 2016

Winner and Top 3 - Make Time Moodboard Challenge

Servus and welcome to the announcement of the winner and top 3 from January's "Make Time" moodboard challenge!


I invited our players to make time for a creative session without a theme or special technique or twist in mind - just providing a moodboard for inspiration - but mainly with the aim to have you all enjoy some precious me-time at your desks (or is it "you-time" in this case?)!

And I found evidence with most entries that some joyful me-time has been had, which of course makes me very happy! So once more thank you for playing along!


Before I announce my winners I just have to announce the prize winner who was selected via Random.org. This lucky winner wins a $25 voucher donated by
http://creativeembellishments.com/

and it goes to.....


Please contact us via the email on the sidebar and we will get your prize to you as soon as possible. 


**********************************************


Now on to my winning project of our moodboard challenge and it is this wonderful card...


 by

I love the subtle but striking colour contrasts and the highly graphical design of this card! It combines a perfect layout with perfect use of colour and texture. Just beautifully composed and so brilliantly done! 


Following up closely my Top 3 projects are


This highly textural altered bottle 
that speaks of a lot of fun and quality time being had during its making

 by 


the amazing "Moments of Time" card
Sara has entered


Just look at these clock faces and the subtle colour tones! Wow!
Obviously a lot of attention to detail (and therefore time) has been put into this project.


and last but not least
a scrapbook page that I especially love for its photographs - looking at some happy moments captured so beautifully made me smile and feel like I was allowed to get a glimpse at some fondly captured authentic happiness of loving people (and not a scrapbook page that was made to show off).


So thank you very much for sharing these treasured moments with me,


Our actual "Sew and sew" challenge has just started and you definitely mustn't miss the wonderful projects the DT have created for your inspiration! I hope to see you play along with them again!

Hope to see you play along with us this month!
Hugs and happy crafting,
Claudia 
xxx