Pages

Wednesday, November 25, 2015

Rustic Christmas Angel Tutorial

Hi and servus!

Claudia here to share another tutorial with you as OCC's Resident Guest Designer. I hope by now you are already in full Christmas swing and my how-to finds you in perfect Christmas-blings-and-wings mood!

And maybe you are also in the mood for playing along with our actual "Topsy Turvy" challenge which can be found HERE. Don't forget - DecoArt are OCC's prize sponsor this month and are giving away a fantastic bundle of DecoArt media goodies to one lucky (randomly selected) winner! There are three more days to enter the challenge!


I created Gwendolyn (my little winged friend has a name of course) from white Fimo air microwave which is a polymer clay that can be hardened in the microwave within ten minutes (yesss!), creates no toxic fumes and is especially light weight. Perfect for a collection of angels to hang on your Christmas tree...

And as a rustic or naive look is what we are up to you can also try this with your kids as they are the best sculptors of all, right?

What else did I use to create Gwen?

- sculpting tools (or cutlery)
- DecoArt media fluid acrylics: Titanium White, Yellow Oxide, Quinacridone Magenta, Titan Buff, Burnt Umber
- DecoArt media fluid acrylic Interference Gold
- DecoArt "Gold Rush" Metallic Lustre
- paint brushes
- clay rolling tool (or rolling pin covered with plastic wrap)
- non stick sheet


First I sculpted Gwen's head using my fingers and some sculpting tools. If you don't have any scultping tools cutlery will do the job as well.

Don't worry if the face isn't too precise - a lot can be "saved" when painting the face. Also make sure you keep the rest of the clay in an air sealed box or bag so it doesn't dry out in the meantime.

Your angel also needs a bit of a bust to fix the dress and wings to. 


Using the rolling pin create the skirt by spreading the clay into an elongated oval of about a hand's width. Torn and uneven edges are more than welcome because they add to the rustic look! You can even tear off pieces once you have fixed and sculped the skirt around your angel's bust until you are content with the shape.

As you can see I created some folds and wrapped my rolled out "sheet of clay" around the neck. Smudge the upper edges of the skirt so it mixes with the clay of the head piece.


Model two simple arms and attach them to the bust the same way as you did with the skirt. Use a tool to press in the fingers' shapes.


Gwen's wings were done as quickly as easily. I simply pressed the clay flat with my hands and spread and tore the clay in all directions as needed. That also created the torn looking edges. Don't get too thin with the middle piece as this will be needed to fix the wings to the skirt on your angel's back.


To fix the wings to Gwen's dress I roughened the clay on both pieces at the spots that were to be fused with a sharp tool. That creates some "grip" for both pieces to hold on to.

Then it was time for Gwen to be hardened in the microwave. I used an old glass plate. To make sure that all parts kept their shapes I formed little balls of the clay and used them as supports (for the skirt and the slight bend with the wings).

I followed the instructions on the package and it went just perfect. No fumes, and really just ten minutes - and Gwen was ready to be painted. Wow! 


I mixed a skin colour from Titanium White, a tiny bit of Yellow Oxide and Quinacridone Magenta. To paint Gwen's face and hands I used a fine detail brush.


Then I painted her dress with Quinacridone Magenta. I also added paint to the inside of the dress so no white spots would be left.


Gwen's wings got a coat of Titan Buff.


Her hair was painted with Burnt Umber. (don't worry - this was just the base for the gold highlights).

 
Then it was time for the first addition of Bling by adding some Interference Gold here and there. Interference paints are perfect for "moving" (dangling) pieces, because depending on the angle you look at it you either see the colour underneath or the gold sheen.


 For more golden Bling and to highlight the texture on Gwen's wings, her hair and her dress, I applied some Gold Rush Metallic Lustre with my fingertips. Before that I dry brushed some Burnt Umber around the wings' edges to create a visible outline.


Here's Gwen's face in the middle of being painted. You could of course paint her face with more visible details (red cheeks and lips and such) - but I loved the gentle expression on her face so I only did a bit of highlighting and putting a hint of red to her cheeks. 


To hang your angel on your tree all you need to do is screw in a small ring bolt at the back to fix a ribbon to.

I hope you like Gwendolyn and have fun creating your own angels!


Hugs and happy Christmas crafting! 
Claudia
xxx


Sunday, November 22, 2015

Top Talent For Shades Of Autumn Challenge


Good morning everyone. Julia here with another Top Talent post. Today our guest is known to many of you for her amazing talent and ability to explore many craft genres. She is the wonderfully creative:

Donna at Inky And Quirky

Donna was the very worthy winner of my Shades Of Autumn challenge and here's what she has to say:
'I'm delighted to be here today and I've made a creation on my favourite surface of wood just for this occasion using DecoArt acrylic paints.'
....................................................................................................


1. Where do you live?
I currently live in Chelmsford,Essex. I also lived in Glasgow for 8 years but I'm a London girl born and bred.

2. If you could only use three craft supplies for the rest of your life, what would they be?
Ooh that's a tough one! I suppose I'd have to say stencils, acrylic paints and lumps of wood to create on.

3. Which blog artist most inspires you and why?
Now this is another tough one. I gain inspiration from a wide variety of blogs but if pushed I'd have to say Dina Wakeley as I love her very loose, natural way of creating art. I can be too neat at times!

4. What colour do you rarely use and why?
I'd have say the colour blue. I very rarely use dark blues at all, it's just not a colour I'm drawn to, I prefer the green spectrum.

5. Do you have your own creative space in your home?
I do at the moment. I had to relocate from using the kitchen table when part of the ceiling fell down on it!! It's only a small room and I've outgrown it now especially when trying to find a place to store all my finished creations.

6. What goal would you love to achieve in your life and why?
I would love to see some of my artwork made into stamps that went into mass production. I would also love to encourage more people to take up drawing too ;)


I'd like to share Donna's wonderful creation with you now:


Wow! What a beautiful piece of art this is. I love that gorgeous Klimt style lady and her glorious hair! The piercing turquoise eyes of the cat seem to follow you where ever you move! I love the delicate background which is a perfect backdrop for the bold images. It's also great to find out a little more about Donna too. Love the idea that one day we may see her art as a set of stamps! Thank you so much Donna for sharing your wonderful art with us at Our Creative Corner.


So, another Top Talent spot is over and we all wait eagerly to see who will follow in Donna shoes from this months challenge. 
If you haven't joined in yet, our challenge this month, along with all the details can be found here
Our generous sponsor is DecoArt who have provided a wonderful prize for the winner but you need to enter first to stand a chance of winning! The challenge will remain open until Saturday 28th November so there's still time to link up a Topsy Turvy project with us.

Thank you so much for reading about Donna today and looking at her wonderful art. It would be lovely if you could find time just top pop over to Inky And Quirky and leave a comment for Donna.

Tuesday, November 17, 2015

DecoArt Sponsor Spotlight #2

and our Sponsor this month is

 
  Today I want to share with you a project I made using some wonderful Decoart Products and show you how they helped me achieve some easy distress effects.

This is easy and quick to make...
Perhaps a gift idea - because Christmas is knocking on the door!


Here are the materials:


First I used Decoart Chalky finish paint Timeless for the centre of the old wooden plaque. On the edges I used Decoart Chalky finish paint Enchanted.
They are beautiful colours. I love the matte chalk feeling, perfect for an old distressed vintage look


After a short drying time, I used Decoart Crackle glaze as topcoat. This crackles as it dries to create an eggshell crackling pattern in just one simple step.


I used a laser copy image and I covered the image with the matte medium.
I then turned it face down onto the wooden plaque - it is like you are hiding the image by gluing it down. Burnish it to make sure it sticks.
Once the medium is dry you wet the image with water and rub away the paper by carefully rolling it with the tip of your fingers.  When all the paper is removed and the black print stays on the page, then you have done everything right


I created the age spots with Walnut Stain Distress ink mixed with a little bit
of water in a spray bottle or with pipette


To finish I used Decoart Soft touch varnish. It's fast drying and you will have a lovely soft surface.


*******************************************


This month a very lucky randomly selected winner will receive such an amazing prize! 
A Decoart Media Sampler Kit
  
...and Andy Skinner has very kindly said he will add in some of his stencils as well! 
 WOW!!! what a wonderful prize!


You have until the 28th November to get your entries in (you can enter up to 3 times!) You could win this gorgeous prize..or be our Top Talent or Top 3! 


Happy crafting!
Kerstin


Wednesday, November 11, 2015

Topsy Turvy Guest Designer


Hi everyone, Lys here!
I'm very happy today to introduce to you Pascale, from Scrap made in Touraine, a wonderful French artist who makes amazing creations, from scrapbooking to mixed media, which are always a great source of inspiration for me. I'll let her show you what she has made for my Topsy Turvy challenge...


Hello Sweeties,

I'm really thrilled to be guest DT here at Our Creative Corner and I want to thank Lys for the invitation. I chose to make a canvas for the "Topsy Turvy" challenge.


And now the whole process, step-by-step


First I primed with two layers of white gesso the canvas. When dry, I added a design with a Alpha stencil with 3D Gloss Gel. I added the design in several place rotating the stencil every time.
When I'm not in an hurry, I let dry naturally for a better result. I continue to added the same design with Graphite paste.
Again I let dry, before adding a last round of design. This time I used white crackle paste.


When the background was completely dry, I sprayed a first layer of ink. Then I started my composition. I glued all the big elements such as the flowers, bulbs and metallic embellishments with 3D Gloss Gel. To glue the microbeads, I used Soft Gloss Gel.
I added a layer of white gesso on top of all the embellishments and let dry for a moment.
Then I added some Mica Powder, sprayed water, added more Mica until I was happy with the result. To finish, I mixed some Black Cherry Mica Powder with some Soft Gloss Gel and dry-brushed the flowers and micro beads with the metallic paint I obtained.


Here are some close-ups:


Thank you again Lys, Laura and the whole team for having me here.  
 Materials used:

Canvas 8"x8"
Stencil - Finnabair Prima - Alpha
Spray Ink - Lindy's STamp Gang - Opal Sea Oats
Mica Powder - Finnabair Prima - Gold, Copper, Black Cherry
Mechanicals - Finnabair Prima - Pendant Caps, Flowers
Texture Paste - Finnabair Paste - White Crackle, Graphite
Gel Medium - Finnabair Prima - 3D Gloss Gel, Soft Matte Gel
Gesso - Finnabair Prima - Heavy White
Flowers - Wild Orchid Crafts - Gardenias, Roses


******************************************

Didn't I tell you she was wonderful? Thanks so much Pascale for this Topsy Turvy creation. Sure you will inspire us and all who can enter the Topsy Turvy challenge until November 28th!

Remember there's a fabulous prize to win from


So see you soon!
Lys.

Monday, November 9, 2015

DecoArt Sponsor Spotlight #1


Hi There, It's Me-Shari!!  Thanks for joining me today for our first Topsy Turvy Challenge Sponsor Spotlight, being brought to us by--
 

I refinished this little 3-drawer chest from this....
 
 
To this....
 
 
I used all kinds of cool DecoArt and DecoArt Media products to transform this once sad little antique store find, into something that can take center stage atop anyone's bureau or craft table.  Let me show you what I did!


I sanded the entire chest down with my hand sander to remove as much of the old paint that I could.  I also glued and clamped down a few spots that had warped and come apart. 


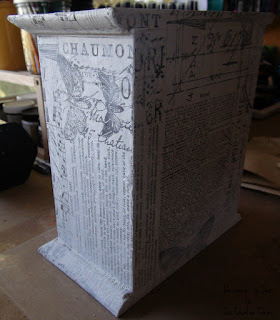
I covered the entire chest and drawers with a coat of DAM White Gesso then laid pieces of tissue wrap onto the wet gesso and pressed down and smoothed.  When the surface was dry, I brushed on a layer of Weathered Wood Crackle Medium.  I'm going to give this chest the Andy Skinner Mega Crackle Technique!
 

I mixed DAM Crackle Paint with DAM Quinacridone Violet and painted over the entire chest and drawer fronts.  The big crackles happen right before your eyes--it's the coolest technique ever!! 
 
 
After all of the paint had dried, I brushed DAM Carbon Black Antiquing Cream over the surfaces and let dry.
 

When the antiquing cream was dry, I gently wiped away the excess with a damp, soft cloth. 


I brushed a layer of Matte Decou-Page over the raised surface of the letterpress blocks and let air dry.  Then I brushed a layer of DAM Crackle Paint over the surfaces and let air dry.   
 
 
I ran a bunch of papers and tulle through my Big Shot machine with the Tattered Florals Bigz die.  I spritzed the burlap florals with DAM Misters in Carbon Black & Violet Shimmer and ran those through my sewing machine to add a little bit of stitched interest. 
 
 
I decorated the top of the chest with all of the tattered florals and wooden spools and glass door knobs that I treated with DAM Crackle Paint.  I dabbed Matte Decou-Page here and there then sprinkled seed beads over the surface, so that the beads would adhere in a somewhat random manner. 
 
 
I painted the butterfly with DAM Carbon Black Fluid Acrylic and let air dry.  Then I spritzed it with DAM Violet Shimmer Mister.  It's hard to see in the photo, but there's a really pretty purpley shimmer to the butterfly. 
 
 
I didn't forget the inside of the drawers--I painted each drawer with DAM White Gesso then lined the bottom of each with a piece of tissue wrap. 
 
 
I also lined the inside of each drawer cubby with pieces of Melange Paper Stash. 
 

I have to admit it--I'm using this at my work table and I've already filled the drawers with all kinds of embellies that were once in a variety of glass jars, taking up lots of precious table space!  This is much prettier than a bunch of glass jars scattered about here and there--now I can find everything within these 3 drawers! 

Thanks so much for joining me today for our first DecoArt Sponsor Spotlight today!


  DecoArt is generously donating a DecoArt Media Sampler Kit to one randomly drawn participant in our Topsy Turvy Challenge this month. 


You've got to be in it to win it, so bring your Topsy Turvy projects over for your chance to win some fabulous goodies.