Wednesday, November 4, 2015

Halloween Horror Winner and Top Three


      Laura here to bring you my Winner and Top 3 for my Halloween Horror challenge

I was amazed at all the wonderful entries - Thanks so much to all who entered.
It was one of the most difficult challenges to judge and I didn't have an easy time
choosing my winner and Top 3...

But before I announce those winners I would like to announce the Sponsor prize winner 

Our wonderful sponsor last month was 


Nicecrane Designs kindly donated a $20 voucher to our lucky winner to spend at their store....

The lucky winner selected this time by Random.org is....


.....Well done Cec!

Happy shopping!
Contact us via the email address on the sidebar and we will get your voucher to you!


**********************************************


And now it is time to announce my winner and Top 3....

It was a really difficult choice - but there had to be just one winner and my winner is...


 I LOVE this creation!
So many different effects were used and there is so much attention to each
tiny little detail - I love it all! 
From the beautiful silvery, marbled background to the amazing skull with flames for eyes.
I think what I love the most are those stunning, tumbling
 ombré roses.....I was hooked the moment I read....
"I envision these as prophecies or pronouncements from the skull 
which issue as living roses in deep red, but which rapidly fade out to black"

..It is a very striking Halloween creation...Well done Lynn!


********************************************


And now for my Top 3....which are featured in no particular order....


  I loved these zombie creations...The one-liners appealed to my 
sense of humour and I adore the addition of red to the photos and 
the shadows under the eyes. The blood splatter against the stark
 black and white photography is perfect too...Lovely!


 A very menacing looking pumpkin!...I adore the tarnished metal
 effect and metal spiders....For some reason this makes 
the pumpkin even more scary. Perfect Halloween Horror!


What a gorgeous skull canvas!...I adore the mixed media layered effects here 
with the splashes of bright colour contrasted against the black and white. 
And the gruesome grinning skull taking center stage....Brilliant!


*****************************************


Thanks so much to all who entered the Halloween Horror challenge. There were so many I would have loved to feature here today...it is such a shame we can't feature more.....

You could be here next month as our winner or Top 3 - Just hop over to Lys' Topsy Turvy challenge and join us in a mixed up, upside down world! Come and have a go! 
 
You could even win this gorgeous prize from this month's sponsor Decoart!
  
 Colours in actual prize may vary
 
 
Remember, you have to be in it to win it!


*******************************


Happy Crafting!
 
Laura 
xxxxxxx


Sunday, November 1, 2015

Topsy Turvy!


Good morning everyone! Lys here with a new challenge for you!

We had so many entries for last months 'Halloween Horror' challenge!
 Thanks so much to all who took part - Laura will be here in the 4th to announce the winner's
Don't miss it!
 
Before we go onto the challenge details for November, I just wanted to let
 you know about this months Sponsor.

We are so thrilled to be welcoming Decoart!


This month a very lucky randomly selected winner will receive such an amazing prize! 

A Decoart Media Sampler Kit
  
...and Andy Skinner has very kindly said he will add in some of his stencils as well! 
 WOW!!! what a wonderful prize! I am envious of the winner already!

 Colours in prize may differ from picture


You can enter the challenge up to three times...get extra chances to win!

...Lets find out about the challenge!

**************************************************


I am so glad to be here hosting a new challenge for November....

Bad weather is on its way and we come back to our warm and tidy homes...
Fancy messing up a little?
We often try to do the right way, use the suitable thing, organize our creations following definite lines or intentions… and sometimes it doesn’t go the way we wanted to. Sometimes it goes to the bin, sometimes we discover something new… and we love it!

On the right side or Topsy Turvy...is there a right side in art?


Now let's discover what our team has created to inspire you:


When I use Brushos, I never know where they lead me... 
This time earth and sky were inverted, at the end of a fantastic journey!


********************


I decided to take the theme rather literally.... :)

********************


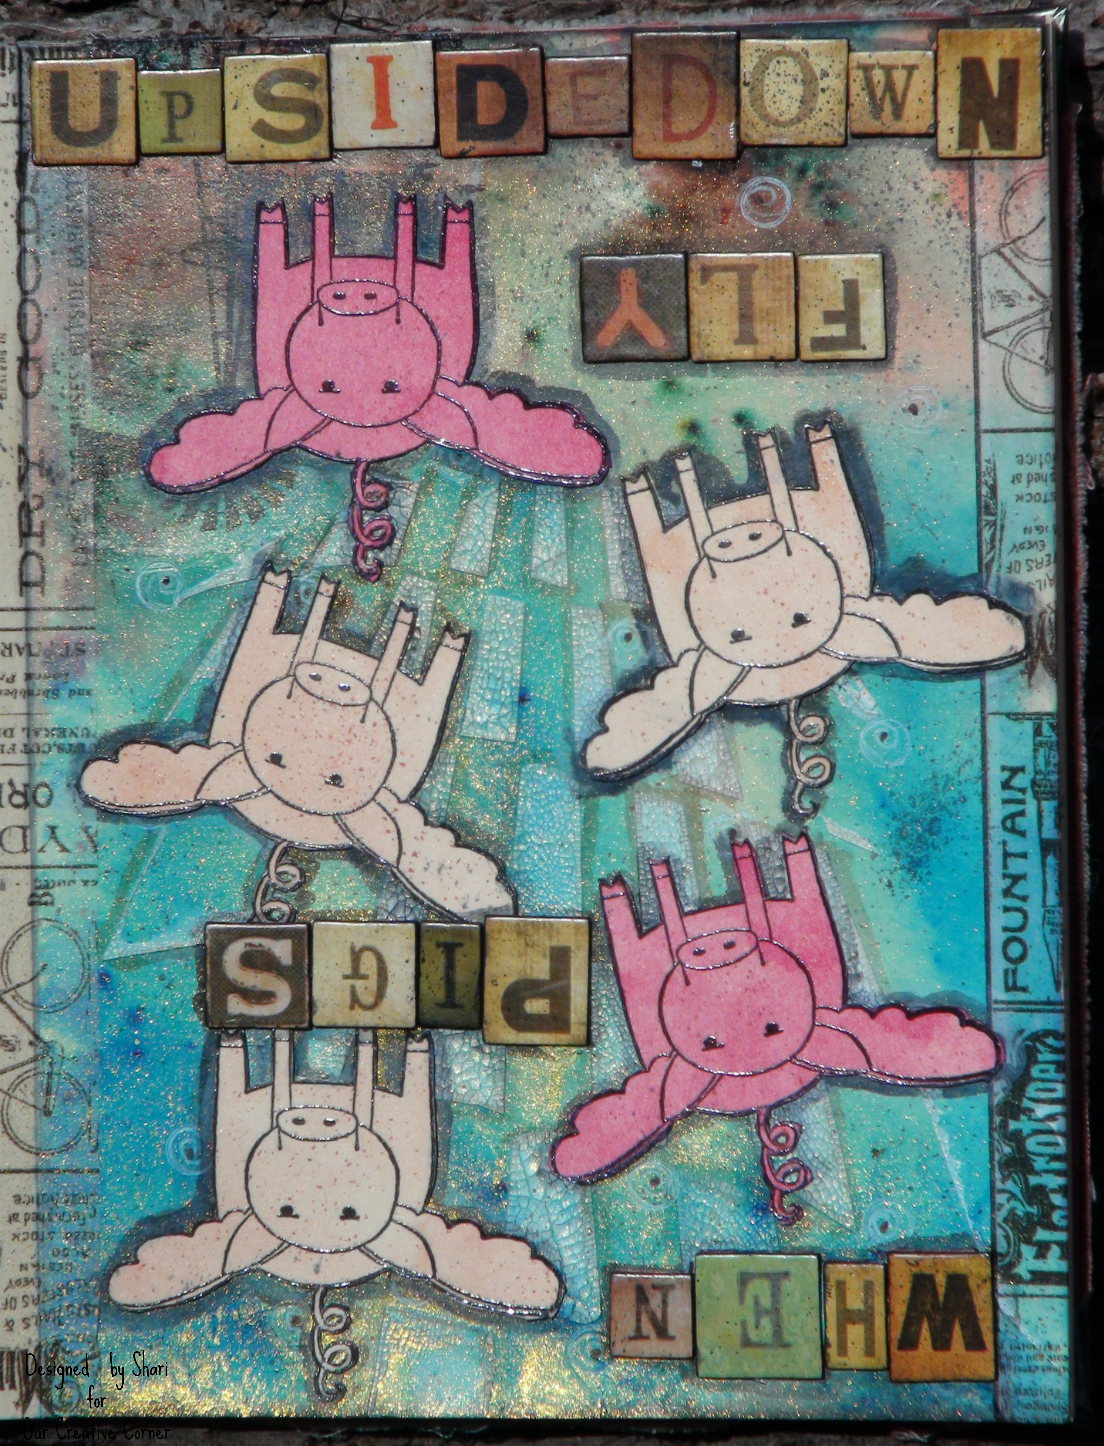
Well, talk about a world gone 'Topsy Turvy' when those proverbial pigs fly upside down!! 
 I created an inverted art journal page that had me dizzy from beginning to end!! 


********************


I have used the theme to try it some new, I like to do this with Mr. Art Journal ;-)
My favourite product in moment is Matte medium as transfer for pictures from old magazines,

and by coincidence this shadow effect behind the face emerged.


********************


I thought it would be fun to show you how I made my no-sew Topsy Turvy Top. I had a white t-shirt that got a splotch of ink on it from a prior crafty enterprise. I decided that instead of tossing the top, I would refashion a whole new festival-esque shirt by incorporating the splotch into a new design with a trippy graphic, doing some (Ed Hardy style) t-shirt kirigami cut-work, braiding it and making it the kind of shirt that you could wear both the topsy way with the graphic on the front or the turvy way with the cut work on the front with an inner camisole for modesty.


********************


Wow, great challenge!

I wanted to explore ideas of symmetry from reflections, very Topsy Turvy. 

I was reminded of The Mirror Lakes ( such an eerie place) in New Zealand that I wanted to create a scrapbook page, but needed some inspiration.

I also have not had much happy experience with Brushos so wanted to experiment with that medium too. I really enjoyed the challenge, hope you do too!


********************


I used cardboard letter leftovers and arrange them in Topsy Turvy style…perfect for background on my new wall hanging…


********************


When I looked at a lot of my work I realised that I created my backgrounds in a particular order: gesso, texture paste, inks and then stamping. So I decided to reverse the order and got this lovely subtle background despite using some very bright colours! I love the result and will certainly be doing it again. A great challenge from Lys and my tag goes to show you don't have to change much to get something a little different. I hope you enjoy the challenge too!


**************************


After much thinking about this challenge, I decided to look at items which had a particular use and turn that upside down and use them in a different way. I used a wooden stamp block as my base, a stamp to imprint clay, a cake mould to make embellishments and a piece of gauze bandage in my background. By this time my brain was completely topsy turvy but I enjoyed the challenge!

********************


How to make something Topsy Turvy? I was stuck for sure! 

But this candle holder actually turned out to be a totally Topsy Turvy creation

From using the die cut letters the wrong way round and upside down to the totally unexpected bright and messy paint effect when I had originally intended doing very delicate pastel colours and crackle....

A totally Topsy Turvy creation!


**************************************


Wonderful creations, teamies! Thanks so much!


So let’s play!: whatever it is: upside down, inverted, reversed or escaping from the right order….

Please show us one “Topsy Turvy” creation, and how it came to life in your hands!


You could be our winner and invited to be our Top Talent!


You could be part of our Top 3!

You could even be our randomly winner of that gorgeous Media Sampler Kit ....


I look forward to see you soon!
Happy crafting!

Lys.


Thursday, October 22, 2015

Top Talent For Mexico Moods Challenge

Good morning everyone. Julia here and it's time to share with you another Top Talent Spot. This wonderful artist won our Mexico Moods Challenge and it's my pleasure to introduce you to:


The hugely creative Anita has a blog called Niti's Art from Heart and I would urge you to pay her a visit and soak up the inspiration by clicking on the link.

Anita has answered some questions so that we can learn a little more about her. Let's hear from Anita:


 am so excited to be the Top Talent and have the opportunity to be guest designer at Our Creative Corner.

I chose to make a canvas art based in the Nordic / Scandinavian light. Particularly light in winter. As you all now it is very cold in Norway, special in wintertime. Those little men and that little boat you can see in the light areas is rubberstamp made out of drawings of original rock carvings in Scandinavia that dates some 3000 years back. Isn’t that cool?

The heart is a symbol of Love. I called this art LOVE. It is a reminder that no matter how cold the world seems, one can warm themselves in love. Love yourself, love art, love life, love colour <3

1. Where do you live?
I live in the city of Bergen in the most beautiful country Norway

2. Do you live by any motto or philosophy?
I do have a motto, and that is: Remember yesterday, think of tomorrow, but live today.

3. What other hobbies/talents do you have that you may like to share with us?
Oh, I do a lot of things. I love crafting, so I’m doing a bit of knitting, crocheting, and renovation / painting of small Furniture. But most of the time I am Art Journaling. It became a near friend of mine and I have my Art Journal With me all the time. When I am traveling I bring my Art Journal and pens, scissors, glue and a ruler (Dylusions Journal Block) with me. And I also love Mixed Media Art on canvas. I do a lot of canvas as well in all sorts of shapes and designs, but I'm a close friend with strong colors so I make mostly art with bright and happy colors.

4. How long have you been crafting and what made you start?
I think I've been crafting all my life, since I was a little girl I’ve always painting and drawing. I do not know how it is in your country, but at the Norwegian primary School there is a study called electives where I chose rosepainting. I think that's how it starts. I did like rosepainting and I got a lot of positive feedback from teachers and classmates. Rosepainting is a classic old Norwegian way to paint roses and leaves in the primary colors of red, blue green and yellow. I am not so very fond of this technique now ;-) Art journaling, I started actually with having been on sick leave for a while and sat and surfed the internet and YouTube and discovered Dyan Reaveley. Now I have seen all her videos several times and she is absolutely amazing. She gave me the kick start.

5. Name three of your favourite crafting techniques and why you like them so much.
My three favourite crafting techniques is number one: inking. Just sit down take my Dylusions ink spray and just spray. I like the inks because they provide so strong colors and they have a little life of their own. One is never quite sure of the result. It gives me a bit of unpredictability.
Number two is painting with baby wipes. That gives me a good feeling. Just pick an acrylic paint, take the baby wipe and just let it flow. Both thoughts and paint :-)
And stamping of course. I love stamping. When I first get started, I cannot stop. I use a lot of stamps. Both background and for image.


6. If you lose your 'mojo', how do you go about getting it back?
When I lose my mojo I see a video or two on YouTube of my absolute favorite artists: Dyan Reaveley, Nika in Wonderland, Mimibondi and Dina Wakley. Then I just go step by step of one of their tutorials and I'm all in again with tons of inspiration and creativity.

Thank you for taking the time to read this. I wish you all a pleasant and creative autumn.
Hugs, Niti/Anita <3


Thank you Anita for your wonderfully detailed answers. It's like sitting down and having a wonderful chat with Anita isn't it?

Let's now have a look at Anita's wonderful canvas:


Anita, your canvas is full of colour and love! The details are wonderfully put together and it's obvious that you have poured love into this canvas. That heart is stunning! Please remember to pop over to Niti's Art from Heart and leave Anita some love - she deserves some back in return!

Anita will now join our Top Talent hall of fame and I do hope she comes back to play with us again. Will you be our next Top Talent? To be in with a chance you need to join in our latest challenge 'Halloween Horror' which runs until October 28th so you have plenty of time and we'd love to see you there. 

Thank you so much for joining us today and reading all about our latest Top Talent.

Friday, October 16, 2015

October 2015 Sponsor Spotlight - Nicecrane Designs

Hello there
Did you know that you could go on over to Nicecrane Designs, a company with oodles upon caboodles of digital designs and choose your favourite, download it and use the image to do whatever you want with it?  How cool is that? 

I am telling everyone that asks that these unique make-up organiser babies are designer pieces from the Nicecrane Design Collection! They look suitably impressed that I have "designer" home accents, and I reckon it might seem completely plausible that this might be the case ;) because these are among other unusual print decor items I have in the same design.


To be perfectly straight with you, I have never really thought about the potential of this option until I went on over to the site and the design penny dropped!  You could customise just about anything with your favourite design (for personal use only ofcourse).  

Let's think about this for a second.  The accessories in your living room might need a bit of an update, you have been to the mall and scoured the decor shops looking for something you like, but nothing grabs your fancy or they might have the design print in one or two items like a cushion cover and a table runner, but that is all and you want the theme repeated on everything!!! You could even want that design hanging as art on your walls.

This I believe is the genius of buying a design off of Nicecrane Designs.  All you would have to do is buy the image once, and then you could use the same image over and over in different applications.  Technically you could makeover your entire room in the design of your choice.  You could have the design printed on block canvas, you could transfer the design onto cushion covers, table runners, curtains, candles, guestbook covers, decoupage it onto trays and vases.  Do you see?  This is an amazing way to decorate on a budget.

What I have decided to do is sort out my horde of make-up.  I needed something that would stay within the slightly steampunky vintage brown, black and cream theme I have going on in the room that I do my make-up in.  I no longer felt okay about digging through the piles of lipstick, eyeliner, mascara etc in the big bucket I had it in.  I wanted something a little more organised, in something cuter and in keeping with the theme.  I am in the process of decoupaging every pot, holder, container in the same designer theme, including upholstery but I thought I would share with you one quick project that I made with one of the awesome Nicecrane Designs.

So to begin with I went over there to choose a design - quite a task because the collections are amazing and it was hard making a choice.


I bought 2 MDF blank letter/mail organisers that looked like this to begin with


I smoothed out a layer of Dala Stencil Glue onto the unfinished blank.  Dala Stencil Glue is my favourite glue because its super tacky, super strong and yet also simultaneously liquid enough to slide things on.  It can also function as a repositionable glue - all in all, a really versatile all round glue.


The last thing I did was to get out all my make-up supplies, arrange them in the way that I thought would be most efficient and voila we have designer decor accents that are actually functional.  


I seriously am in the process of having everything printed with this image.  I made little boxes with this print to store my everyday blusher, Make-up remover wet-wipes , decoupaged around a coffee tin to store make-up brushes and hair brushes.  I am in the process of transferring this print onto a canvas block for some wall art.  I am going to transfer the print onto some cushions as well! I cant believe that it didnt strike me before to do a house make-over like this.  Not only is it refreshing to have a new look going, but it is way more affordable and then there's added bonus of crafting everything yourself.  Could living get any more fun?

While I am still here - if you want to win a chance to do a home make-over like this - be sure to play along with OCC's  Halloween Horror challenge this month.  You stand to be in the draw for a $20 voucher to Nicecrane Designs just by entering your project into the monthly challenge. You could do over the whole house with $20!!!!

That's it for me for today.

Happy Nicecraning!


Sunday, October 11, 2015

Spooky Skull Tag


Hi everyone! Laura here with our Guest designer for October...I have been so looking forward to this!!!

    I LOVE this designer! She is someone who has inspired me since I first arrived in crafty blog land and I love her work. She is such a creative artist and her work is so wonderfully inspring - she does the most brilliant, informative step-by-step posts - with amazing detailed photos of her work (as you can see from today's post!) - so you really can never leave her posts without feeling so sparked with ideas galore!

    I have the wonderful pleasure of introducing the amazingly creative Anna-Karin from Layers of ink 

Over to you Anna-Karin.....


******************************* 


I everyone! I am so happy to be a guest designer at Our Creative Corner. Halloween crafting is so much fun and today it is time for a spooky project.


I thought Tim Holtz new Skull die would work well for a spooky project, especially with some added dimension and distress. There are a few spiders hiding on the skull too. The inky background is fun to do, and can easily be adapted to other types of projects if you use different inks, papers and stencils. I took a few step photos.


Start by die cutting the skull from Wendy Vecchi's Clearly For Art Modeling Film. 


Colour the skull at the back using alcohol ink and an ink blending tool with a felt square. Start with Snow Cap Mixative - always shake the bottle first - and continue with Pitch Black.


Stamp the skull on the front with various stamps and Stazon Jet Black. This both adds texture and makes it spookier. 


Heat the Modeling Film with a heat gun and shape the skull. Be careful not to burn yourself. You might need to work one section at a time, because the film cools down quickly. Once it is cool, it keeps its shape perfectly. If you are not happy with the result, simply heat again and reshape. 


The tag was covered with Regions Beyond patterned paper and sanded. Place the Shatter stencil on top and ink with Wilted Violet and Hickory Smoke.


I added some Regions Beyond Decorative tape to the background. Place the Batground stencil over the background and apply Transparent Gloss Texture Paste through the stencil with a palette knife. Pour Black Soot Distress Glitter on top. Set aside to dry. I attached an Oddities Adornments token with a brad.


I also added a spider from the Wicked Alpha Parts set to the skull. Attach the skull to the tag with tiny staples.


The dimension, alcohol ink and stamping makes the skull pretty spooky.

Staple a Word Band to the bottom of the tag and you are done.

Here you can see the dimension of the Modeling Film a little better.

I hope you enjoyed this post! I had fun making a spooky project for this guest post for Our Creative Corner. You can always visit my blog Layers of ink, for more inspiration.

Thank you for looking!

Happy crafting!

Anna-Karin

Supplies:
Surfaces: Ranger Manila Tag; Tim Holtz idea-ology: Regions Beyond Paper Stash; Wendy Vecchi Stamper's Anonymous Clearly For Art Modeling Film
Dies: Sizzix: Skull
Stamps: Tim Holtz Stamper's Anonymous: Undertaker, Apothecary, Mini Halloween
Ink: Ranger Distress Ink: Wilted Violet, Hickory Smoke; Tsukineko Stazon: Jet Black
Alcohol ink: Ranger Adirondack: Pitch Black, Snow Cap Mixative
Medium: Ranger: Transparent Gloss Texture Paste
Glitter: Ranger Distress Glitter: Black Soot
Stencil: Tim Holtz: Background, Shatter
Embellishments: Tim Holtz: Regions Beyond Decorative Tape, Wicked Alpha Parts, Observations Word Bands, Oddities Adornments

******************************************

WOW!!!! Anna-Karin...words truly fail me....Thank you so much for joining us here today - You have done exactly what I knew you would - knock our socks off!
This post is as brilliant as always....I am so grateful to you for bringing your unique creativity to Our Creative Corner this month...


Remember the challenge continues until 28th October...Get those scary creations posted to be in with a chance to be a winner!


Wednesday, October 7, 2015

Let's go Trick and Treating!

Hi and servus! Claudia here to bring to you another (hopefully inspiring) tutorial.

I know it's been quite some time since my last post over here as the RGD (Resident Guest Designer) - due to my usual creative silly season. But once it gets colder and darker outside the cosier and more comfy it gets inside the house - and then spending time at my crafting desk (with a warm cup of tea and all of my paints, dies, stamps and mixed media supplies around me) is what feels right and good again.

This year I am in a very Halloween-ish mood and have already admired a lot of inspiring spooky goodness in blogland! This is my share:


I created this art journal page using some of my all time favourite Tim Holtz dies (the On the Edge "Graveyard" and the "Rickety House" Alterations die) and my new favourite Dreamweavers forest stencil and combining it with some hand drawn images.


I always keep the acetate packaging the Sizzix dies come in for later use. This time I die cut my own reusable stencils and masks from it to combine with other stencils to create some scenic backgrounds for my illustrations.


I just love this cute little graveyard and the mask I made with it! I decided I wanted to use it together with the forest stencil in one go and fixed both to my journal with masking tape, making sure both were in place. The page's background had previously been given a coat of rough wide brush strokes in dark grey and black acrylic paint. Now - with my masks in place - I stippled on some Medium White, Beige and Orange with a stipple brush, making sure the paint wasn't too liquid and the brush was dry.


I had also die cut an acetate mask using the "Rickety House" Sizzix die and I used both - the outer frame and the house-shaped mask to create my house shape first by adding more black paint using the house stencil (=outer frame)...


...and then stippling in the yellow-ish lit windows (using the house mask) and their shine thrown upon the ground in front of the house (you will find that I redid this once I had finished my trick'n treatin' children's drawing as I wanted their shades to be in a specific spot and angle on the page). You can also see that I had to go in again with the Dreamweavers stencil and redo the bit of forest that was now covered from creating the dark background for the house (the spot at the veranda).


The owl was first stamped on, painted over with beige and black where needed (to cover up the branches that showed through) and then I hand drew in the feathers and face using a black permanent fine tip Faber Castell PITT artist pen


Here you can see the redone thrown light from the window - ready for my fussy cut children's image and the stamped and painted on quote to be glued in place:


Once I had found the proper spot for my drawing I glued it on with matte medium and then painted some shades of the green-yellow colour from the window lights and some orange  shades (from the sun shining through the fog behind the trees) around the children's shapes to blend them in and make them part of the whole scenery.


The drawing was done freehand - after doing a rough sketch with a soft pencil first - with the fine tip black Faber Castell PITT artist pen. I didn't worry too much about them maybe looking awkward - with Halloween projects this may well add to the spooky impression, right? But here they are - obviously a bit scared of the house and still deciding whether to ring the bell and shout their "trick or treat!" or not.


I hope you like my little Halloween scene and what I did with my selfmade masks and stencils!


Hugs and happy crafting,
Claudia 
xxx