Sunday, May 8, 2016

Crafty Individuals Spotlight No.1

Hi everyone! 

Laura here to introduce our first Sponsor Spotlight for this month! Our Sponsor this month is Crafty Individuals who have so generously donated a massive bundle of goodies that will be on it's way to one very lucky winner this month. 

To demonstrate some of their lovely stamps and masks is our wonderful Joi....She has done her usual magical work on an amazing masterpiece. Please read on and see what she made because it is well worth seeing!


~~~~~~~~~~~~~~~~~~~~~~~~~~~~~~~~~~~~


HOWDY from Joi at RR!
It's gorgeous at the ranch today - spring is in full bloom. 

I have been having fun playing with the high quality CRAFTY INDIVIDUALS stamps & masks.

Below are links to the three wonderful Crafty Individuals products I used.


Of course, the Leafy Branches Mask was cut to use!! 


And here is my creation for Crafty Individuals! 


                                                             I began with a napkin!!


Using DecoArt Decou-Page, the napkin was added to an 8x10 canvas board. Matching tissue paper from my stash seemed to be super colors for the bottom half and it had some shimmer too! 
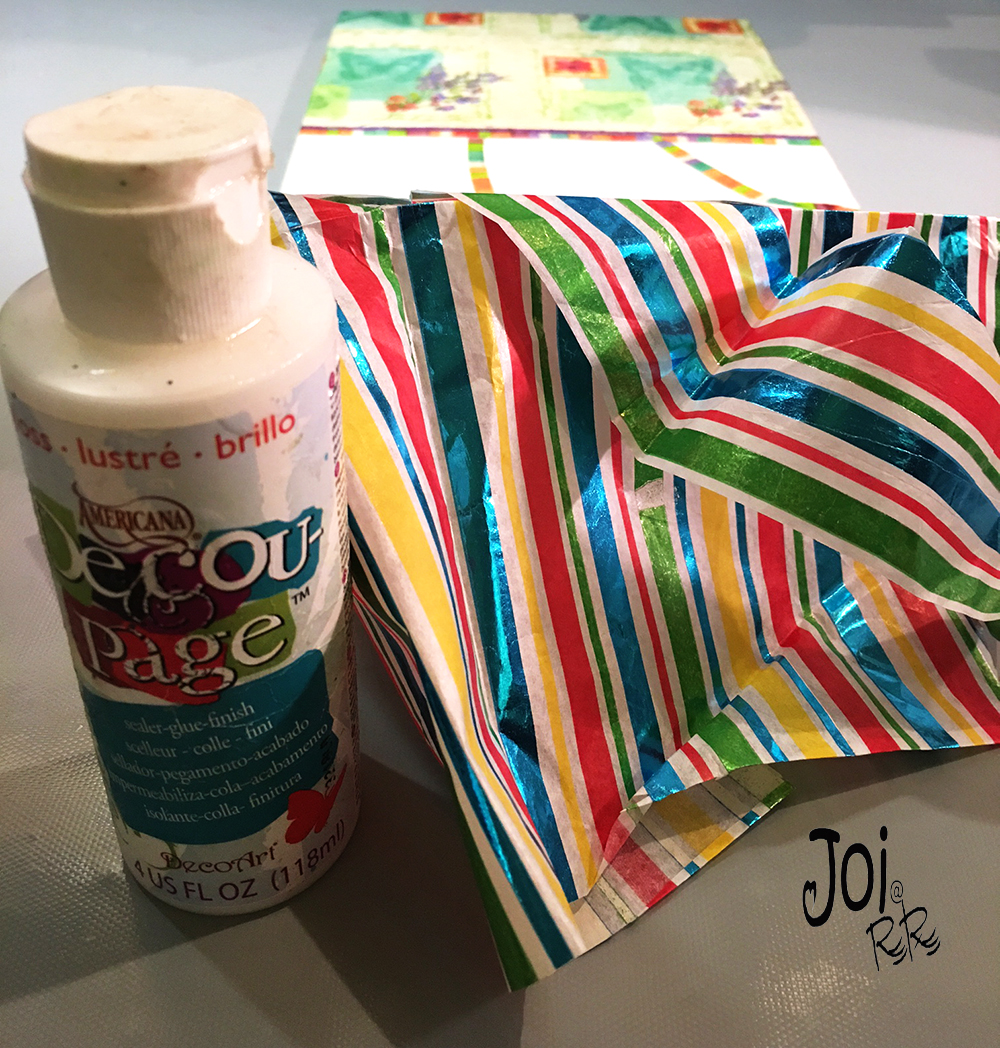


Finished gluing - and here is the result!


Mixing DecoArt Media Yellow-Green Light Fluid Acrylics with DecoArt Media Crackle Paint, created the color for the path.   


Using a palette knife to spread the pathway and a credit card to make the grass tuffs....

 Vio-la...... the crackled pathway emerged. 


Gently wiping on DecoArt Majestic Purple Metallic Lustre with my finger... the cracks were accented. 


Using some more of the Yellow-Green Light paint and my long haired brush - some more grass tuffs appeared. 


Using Staz-On inks... I began using the wonderful stamp sets from Crafty Individuals.


Actually, I'm not sure why I stamped the Crafty Individuals "Walk In The Park" couple in red... just picked it up first and thought - why not.  Imagine my surprise when the red that made it onto the canvas.  No idea why - it just seemed to be "right"!   

The stamped Crafty Individuals "Flowers Heads" were decorated with my ever faithful Faber-Castell Pitt Pens.


There were a few pieces of the napkin left, so here you see the cut-out pieces that were Deco-Paged onto the board here and there. 
Hehehehhe - almost used every inch of that napkin!  

Using DecoArt Media Modeling Paste and the incredibly nice quality Crafty Individuals "Leafy Branches" Mask.... I began "building" the archway. In the picture below - one side is already done - and the other side is in process with the mask still attached.
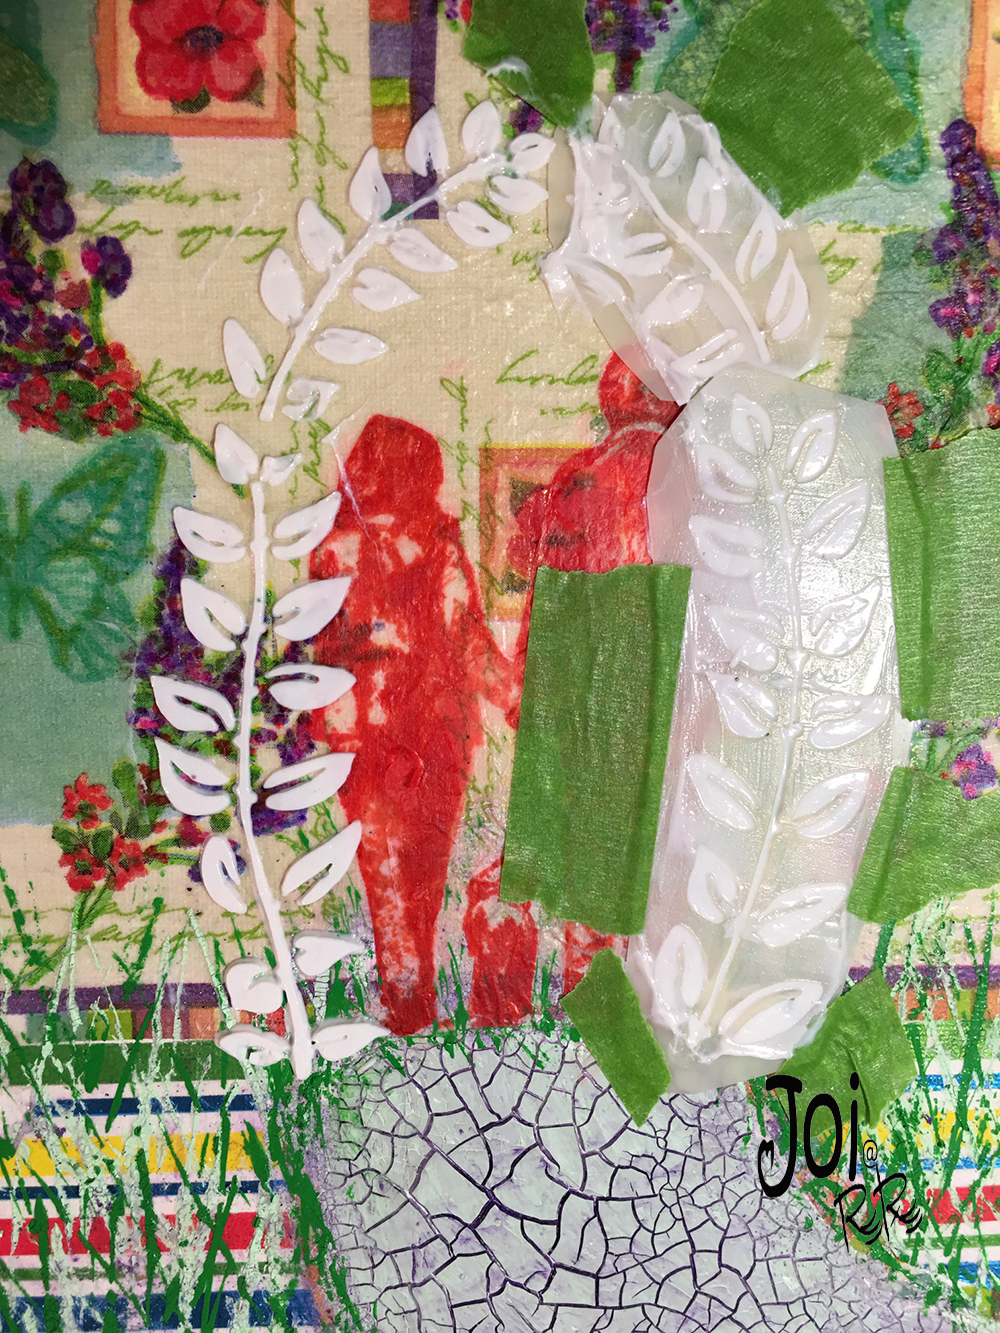

Then, began the painting!! 

You can also see in this picture that the Hero Arts stamp - appreciate WHAT IS - was used . . . . 


The archway needed to look "special," so out came some Ranger Stickles and Liquid Pearls, to add that beautiful shimmer!


In the beginning, I was just painting in the places that were already there on the napkin but... I couldn't contain myself and before long the bunches of flowers became trees!!!! 


I added a few jewels from my stash near the horizon line! 


These pictures were taken in hopes that perhaps you can see some of the glitter and shimmer of the piece. 


And here are some pictures of the finished piece


So happy to see the crackle thru the lovely flowers!!! 


Products Used:


Thanks bunches to Crafty Individuals and Our Creative Corner for giving me this opportunity to play with such nice quality stamps and masks. It was an adventure in creativity for me!

Don't forget to finish your project for our "HIT THE BOOKS" challenge.  I know you have some book paper!! You could be the lucky randomly selected winner of a huge bundle of Crafty Individuals goodies to play with!

Remember....
"APPRECIATE WHAT IS"
Even on the most challenging days......we can all find something to appreciate each day and be thankful :)

Big Hugs. j. 


Wednesday, May 4, 2016

Gypsy Fayre Winner and Top 3

Hi everyone! Candice here to bring you my winner and Top 3 post.
What a difficult task it is to choose a Winner and Top Three for the Gypsy Fayre Challenge!
But first lets do the Sponsor Prize! Our Sponsor last month was Tando Creative

And the lucky winner selected by Random.org was....
Congratulations Jenny!! Please contact us via the email on the sidebar by 18th May and we will get Tando to deliver the surprise bundle of goodies to you!

 ~~~~~~~~~~~~~~~~~~~~~~~~~~~~~~~~~~
All the entries were truly something spectacular to behold and it was so awesome to look at all the amazing projects and read about how each piece was created.

It was not easy, especially after going through each entry and seeing how much effort was put into each piece by all you incredible artists.  However, the rules are the rules and we have to make good on our promise to award a Winner and Top Three.

So without further ado - here they are.

The Gypsy Fayre Challenge winner is:

 Nate

Produits DecoArt

The composition, the assemblage of all the lovely bits and bobs and the colour scheme was so on the mark with the challenge theme and just darn gorgeous to look at.  Congratulations Nate - I kept going back to look at your stellar creation. We will be in touch soon to arrange you being our last ever Top Talent at Our Creative Corner.


and now for the Top Three in no particular order of preference.

Corrine

 P4086349

Such a pretty thing to look at.  You have managed to match those colours to the challenge theme colours perfectly - So dreamy and psychedelic.  I loved that blue mushroom.  

Sabine


Everything about this tag and card made me want to get up and dance around the room in glee.  A happy, fun and delightful entry to look at.  Anyone would like to pin these on their feel-good board.

Jackie P. Neal


You must go over to Jackie's blog and see the close-up details on this box of exquisiteness.  I was completely blown away by the texturing and the colours. She creates a kaleidoscope, such that it almost looks iridescent.  I should imagine that no self-respecting gypsy cart in the world could not have one of these beautiful boxes.

~~~~~~~~~~~~~~~~~~~~~~~~~~~~~~~~~~~~~~

Congratulations to all the winners and thank you so much to everyone that contributed their projects that inspired us all to create, appreciate and love beautiful things.  You all make the dreary world a much prettier place to be in.

That's all for now from me.  Looking forward to seeing your projects again for the "Hit the Books" challenge this May.

-Candice-


Sunday, May 1, 2016

Hit the Books


Hi! Jennie here with you this month hosting my first challenge for Our Creative Corner. 
 I do hope you enjoy the challenge theme I have chosen for you, but before I introduce my challenge I would like to tell you about our Sponsor for this month

Crafty Individuals has given us a massive collection of stamps and other goodies 
for one lucky winner this month! 
All you have to do to win this gorgeous bundle of goodies is enter my challenge - and you could be the lucky winner selected by Random.org.

As you already know we are no longer selecting winners to be featured here as our Top Talent, but I will still be selecting my own winner and Top 3, so badges could be on their way to you!


Hit the Books

I adore old book paper and old books and I am always glad to be able to breath new life into a dilapidated book which most people would consider throwing out!


For your projects this month we would like to see you searching through your stash for old book paper or books and create a project with what you find.
 You might want to use papers within your project or you might want to breath new life into an old book by altering it in some way.
I hope I have chosen a challenge theme with huge scope for projects small or large.


Whatever you make, let us see you give those old book papers or books centre stage!


Having saved a number of Penguin Paperbacks from going to the skip I decided to use some of the pages which were beautifully aged to "make" a book. It was great fun making and decorating the covers for the folded pages. 


 ********************
 Ana


Old book papers are part of my creating all the time…probably you expected that I would make some kind of vintage collage….well, that would be too easy...I decided for mixed media journal page….layers of book sheets and paint have created beautiful textures....


********************


I've used some vintage book papers on this card. There's lots of stencilling, stamping, stitching and some home made washi style tape using the book paper. I don't usually make cards but this was so much for Jennie's lovely challenge.


 ********************

Lys


I chose an old Latin-French dictionary page, and played with my Brushos, inks, stamps and stencils, scraps of papers... to give it a new life.


  ********************

 Trish


I have chosen to create jewellery again! This time, an Autumnal necklace made from twisted wire, using book pages as the base for my jewel toned 'leaves' :)

 ********************

 Jan


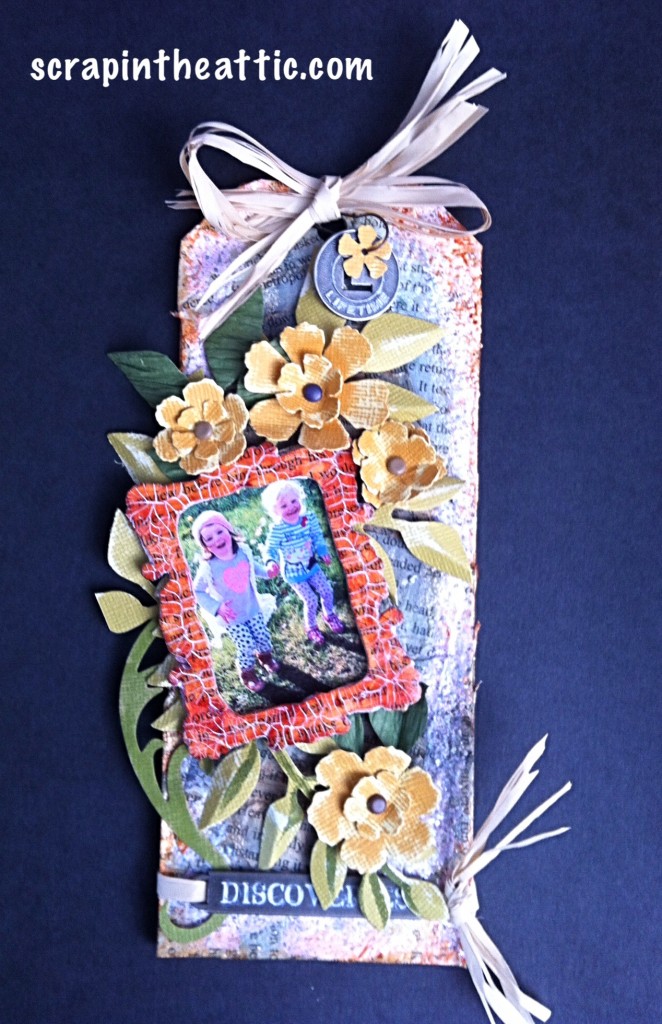
           I love this picture of my Granddaughter in the Spring daffodils with her friend. 
          I used an old book of Fairy Stories to cover the chipboard tag and the tiny frame.


********************

 Laura


I was so pleased when Jennie announced her challenge because
I had a gorgeous book that I had been wanting to cut to bits and 
transform into something else. It was so much fun to make!

 
 ********************


With the coming of Memorial Day and all the Election Year hype...
Hope, the Patriotic Puppy is enjoyed wearing a news print Uncle Sam hat!
Today, his head "hit the books"... he was almost asleep when I snapped this pic!


 ********************


I wanted to update the boring soap and hand cream dispensers in my bathroom.  Instead of buying expensive bottles from a homestore, I modpodged book paper over cheapie plastic dispensers, used some Tim Holtz letters in an old typewriter-esque font and added some ribbon and embellishments. And voila- it matches the theme I have going in the bathroom better than anything I could have bought.


~~~~~~~~~~~~~~~~~~~~~~~~~~~

Well you can't but be inspired by the inspirational talent and projects this wonderful Design Team have come up with this month (as they do every month!) and I do hope it spurs you on to hit your books and join us in our challenge.


Tuesday, April 26, 2016

Walnut Ink Tag Trio

Servus!

How lovely to see you pop by today! Claudia here - welcoming you to Our Creative Corner as their proud Resident Guest Designer!

I would like to share with you a tag trio I made some time ago when experimenting with Walnut Ink Crystals. Walnut ink is a die ink and mainly used to antique papers and also comes in liquid form, but I love the crystals as you can also sprinkle them onto wet surfaces to create stunning (random) effects. But this time I used them for some mark making with a Chinese calligraphy brush to create these three tags:


I have taken steps images so you can see how I built up the different layers:

Step 1: I simply dipped my calligraphy brush into my walnut ink solution and tried different brush and splatter patterns on some tags I had cut from heavy watercolour paper. I let the ink pool in some spots which formed the darker areas. I tried to speed up the drying process with my heat tool but that only started to shift my ink puddles around - so I decided to let everything dry naturally.


Step 2: I added some stamped script in dark brown archival ink.


Step 3: next I glued on some scraps I tore from old dictionary pages using Matte Medium. My design followed the walnut ink drawn shapes and I tried to create visual tension, adding to the shapes and directions that were already there and trying to enhance any focal spots.


Step 4: with a palette knife I added some "Rusty Paper" from Viva Decor here and there.


Step 5: I also scraped on a little bit of white Gesso in some spots to fuse all my layers with the white background and to add some texture.  The secret to a satisfying result is to not add too much so you still have some "emtpier" areas on your projects that create visual tension (and therefore interest) in contrast to the more busy ones.


Step 6: I finished off my tags by adding some word stickers and handwritten words.


Here are some close ups to illustrate some of the effects in more depth:


I love the circle shapes where the ink has puddled in some areas. These were "stamped" on by dipping a felt tip pen cap into the walnut ink.


The large circle was hand drawn.


If you use Walnut Ink Crystals on mixed media pieces always keep in mind that they react to moisture (from paints other inks, water, glue,...) and will bleed through.  You can spot this a bit with the image above where the white Gesso got a slight brownish tint.

You can either make this effect an intentional one with your projects or make sure you seal those layers before you continue adding other media that might re-activate your walnut ink marks. But no matter which way you choose - using Walnut Ink or any other die inks always is great fun!


There are still two more days to enter Candice's lovely Gipsy Fayre Challenge! There have been some fantastic entries so far but I am very curious to see YOURS too! ;)

Hugs and happy crafting,
Claudia 
xxx


Friday, April 22, 2016

Top Talent For 'Sew & Sew' Challenge

Good morning everyone. Julia here with another Top Talent spot to inspire you. This time we have the very creative winner of Jan's Sew & Sew challenge:


Before we see the gorgeous project that Roni has made for her Top Talent spot, let's hear a little more about our wonderful guest in her own words:

Where do you live?  I live in Albion, Indiana, USA - a very small rural town in the mid-west.

What makes you smile? So many thing...experimenting with a new art medium; tearing the wrapping off of a new ink pad or inking up a stamp for the first time; finding a stash of vintage ephemera waiting to be loved, jumping in and getting messy...  I like the hands on approach to art and enjoy getting inky!

What is your favourite style of crafting?  I'm a bit of an eclectic artist - it depends on what mood I'm in and what has inspired me on a particular day.  I can go from CAS all the way to the other spectrum and get down and dirty with paint, inks and ephemera!

Name one product you couldn't live without and tell us why. Memento Tuxedo Black Ink - It's such a lovely ink to work with, it produces nice dark impressions and can be used with a variety of other mediums.  

What was the last stamp set you bought? Graphic 45's Voyage Beneath the Seas Stamps

Paint or ink? Or both? Why?  Both!  There are just too many fun techniques where you can layer on more of both.  

My name is Ink Stained Roni and I was so excited when my sewing themed collage was chosen as the winner,  Little did I realize I would also be asked to be April's Top Talent ~ very thrilling.  I enjoy the challenges so very much here at Our Creative Corner that I decided to follow along with this months challenge - Gypsy Fayre. and created my project with that in mind.  


So I gathered up all of my spare beads and decided to make a chunky gypsy bracelet or at least what I would imagine they might wear.  I tried to incorporate as many of the beautiful bright colors from the inspiration photo and swatches as I could.  It was one of those projects that once I started I couldn't stop until it was finished.  Needless to say, my sweet husband had to wait on supper a bit that night.  He's a good sport though - he understands when inspiration hits you just have to go with it.

Thank you so much for allowing me to share more of my art with you and your readers.


Wow!! I adore beads and just love what Roni has done with hers. (I don't make jewellery and always have the greatest respect for those who can!) Even better that she cleverly based it on our current challenge Gypsy Fayre! I had to laugh when Roni said that both supper and a hungry husband couldn't stop the creative process! Roni, it has been a pleasure communicating with you and getting to know a little more about you from your Questions & Answers section. Thank you so much for taking the time to join us with your gorgeous bracelet. I hope everyone will pop over and visit you to see more of your creativity - just click here.

If you haven't joined in with Candice's wonderfully quirky challenge yet, just click here for the full details and link up with us. The winner of Candice's Gypsy Fayre challenge will be our final Top Talent spot. If you want to be that person, you need to get busy NOW!!

Thanks for joining us today and remember to visit the lovely Roni and leave some love!